


.svg)
Amazon Connect Communications Widget: In-app, Web, and Video Calling
In this digital era, effective and seamless communication is paramount, and Amazon Connect continues to lead the way in providing innovative solutions, most recently with the release of In-App, Web and Video calling at the end of November 2023.
In the realm of chat communication, Amazon Connect has allowed the integration of Amazon Lex for some time - enabling agent-less interactions and allowing for a smooth transition to an agent when necessary. This can be elevated by leveraging interactive menus in various engaging forms such as quick replies, carousels, and list menus. I’ll touch on these and some examples in this blog.
The spotlight of this blog post, however, is on In-App, Web, and Video Calling capabilities. These capabilities empower businesses to offer personalised voice and video experiences directly on their websites and mobile applications. Customers can now connect with ease, eliminating the need to navigate away from the platform.
This comes with the extension of the Amazon Connect Chat Widget into a fully managed Communication Widget, with incredible ease of implementation. AWS (Amazon Web Services) does provide the SDK and tools necessary to develop a fully custom experience if you prefer to do so, but this blog will focus on the speed and ease that you can get started with the out-of-the-box widget.
Spotlight: In-App, Web, and Video Calling Capabilities
Just how simple is it to get started?
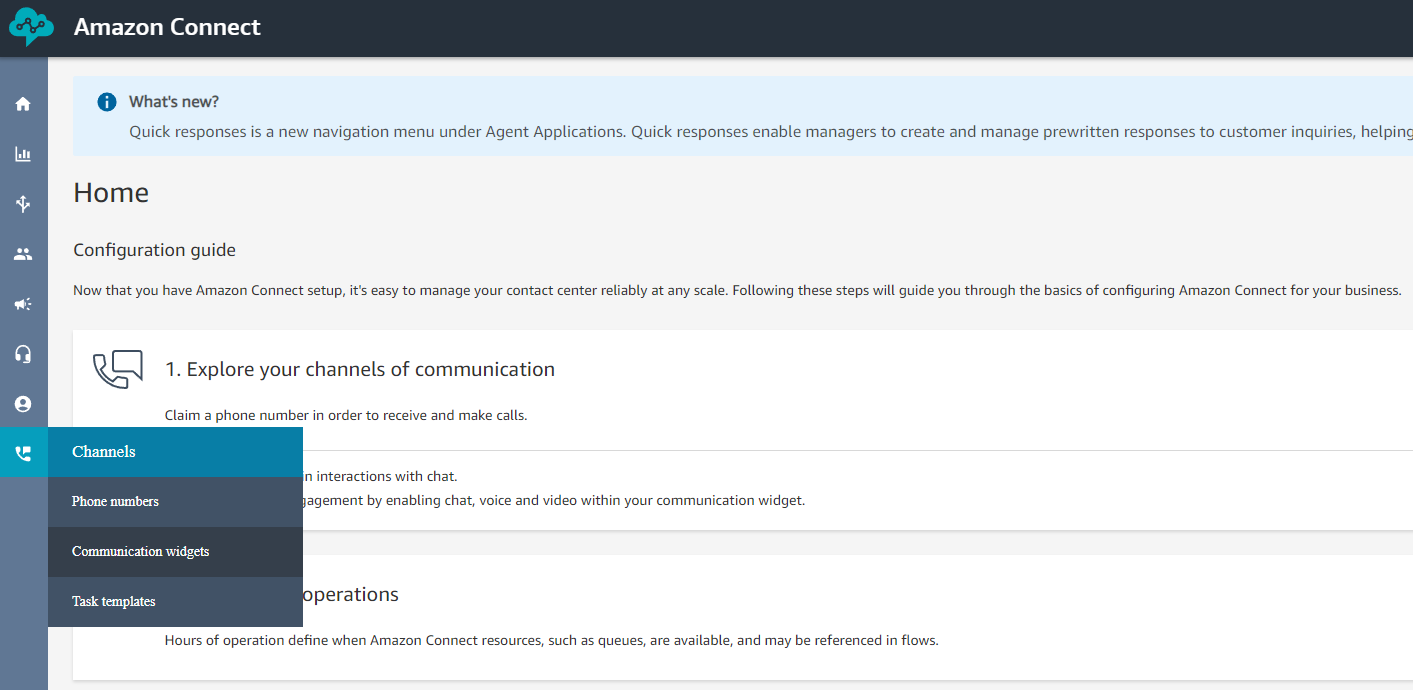
From the Amazon Connect Dashboard, navigate to Channels -> Communication Widgets using the menu on the left-hand side.
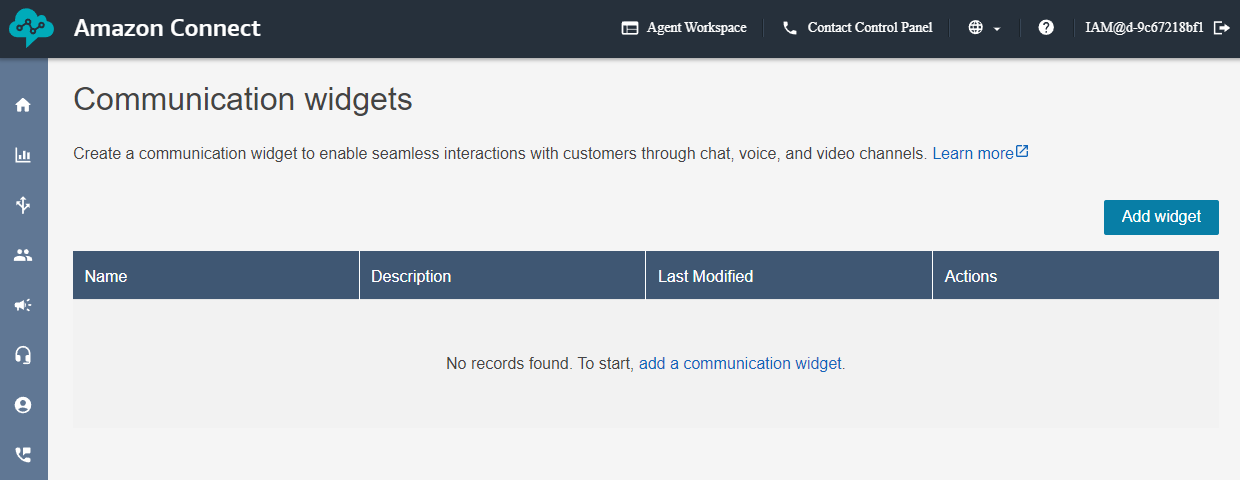
Click 'Add a Widget.'
Configure your preferences, here you can select the channels that you want to make available from your widget. You can also choose to enable/disable video for both Agent and Customer.
Here you need to specify which contact flow you’re going to use for each channel – for Chat, you may want to use a flow integrated with Amazon Lex to handle some queries without the need for an Agent. For Web Calling you could select an existing flow used for phone call routing without needing to do any extra development.
If you’re just getting started, then you can pick the ‘Sample queue customer’ flow provided by Amazon Connect, this will simply route customers to the Basic Queue on any channel.

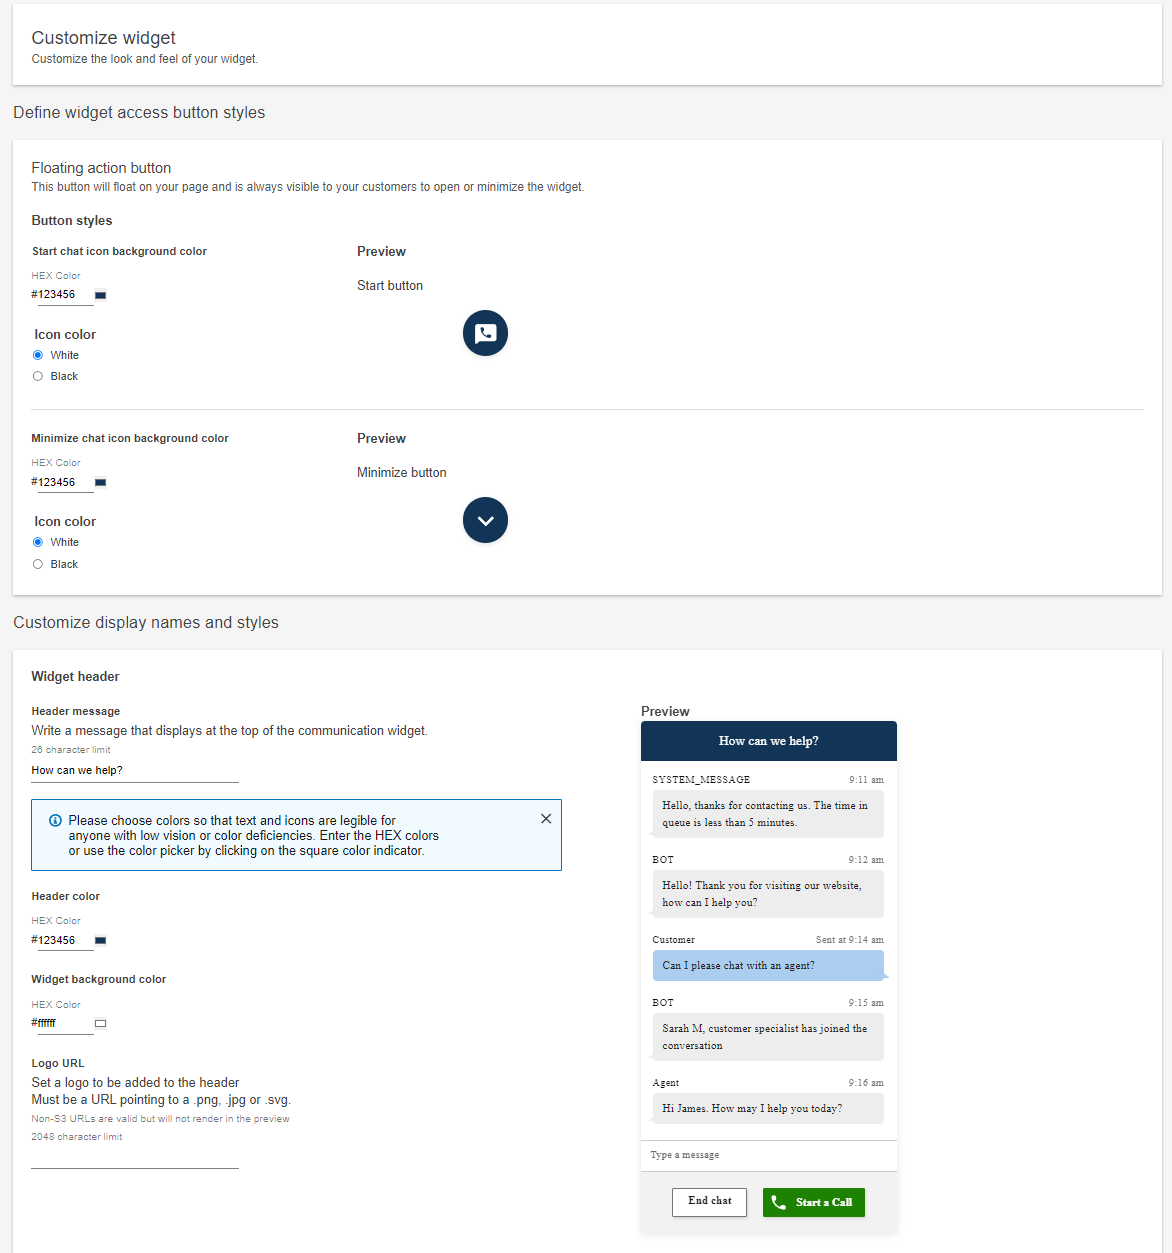
On the next page, you’re given a whole host of customisation options for your widget. You can change the colour of different parts of the widget to match your branding, change the font style/size and even add your company logo – you can visualise the changes in the preview on the right-hand side.
Once you’re finished, or if you’re just wanting to get started quickly, click ‘Save and continue.’
You then have the option to add the domains that you want to use to display your widget. If you want to add the widget to a simple webpage and test it out locally, you can simply add http://localhost:3000. Otherwise, if you’re going to add your widget to a webpage distributed using CloudFront for example, you can add the CloudFront URL here.
You also have the option to secure your communication widget further with JSON web tokens if you wish, this is likely something you’ll consider for a production build, but if you’re just getting started then skip the step as there’s additional development required.

And that’s it! In just 3 pages, your chat widget has been created and it’s ready to be added to your webpage or application.

Amazon Connect provide a JavaScript snippet that you can use to add the widget to your page, once you’ve added the script, you’ll see the icon to open your widget in the bottom right-hand corner of the page.
Add your Widget to a Simple React App
To implement this onto a blank page using React, you can follow the below steps (You’ll need node.js and the create-react-app library installed.)
Using the command line/terminal, navigate to the folder that you want to create your react site in.
Use the command `npx create-react-app my-app` replacing my-app with a name of your choice. This will create all of the folders and files needed for your project.
Then in App.js, replace everything with the below snippet:
Then save, and in your terminal navigate into the project folder and use command `npm run start`. Your webpage will launch on your localhost (make sure you added localhost to your widget domains!) and you’ll see the widget icon in the bottom right.
In less than 5 minutes, you’ve set up chat, web, and video calling – while it may be a very basic implementation, you’ve got a canvas to add all the enhancements that you want. Your customer now no longer needs to navigate away from your page or pick up the phone to have a voice interaction and you can leverage your webpage or application to pass contextual information to Amazon Connect, enabling you to personalize the customer experience based on attributes such as the customer’s profile, authentication status, or actions previously taken.
Considerations:
1. If you’re implementing the out-of-the-box communications widget and allowing chat as a channel, when the widget opens in your application or webpage, the chat is automatically started. If you’re using basic routing straight to a queue, every time the widget is opened, an agent will be connected with a customer and so you may want to consider integrating Amazon Lex into your chat flow if you haven’t already, you can develop your Lex Bot to handle any FAQs, before handing off to an agent when necessary.
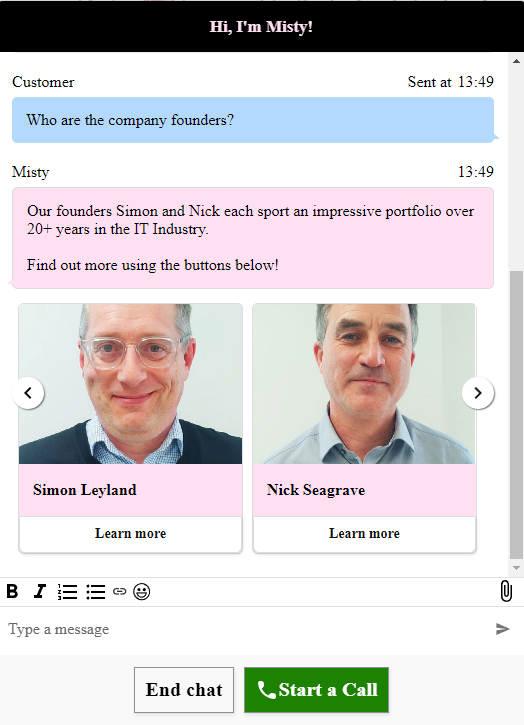
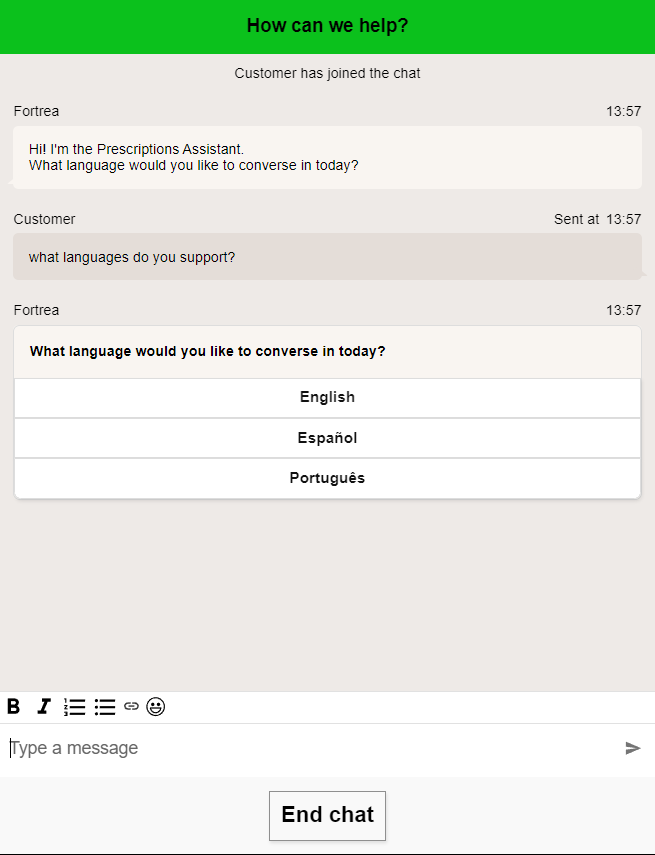
Additionally, you can make use of powerful features like Chat Interactive Menus to enhance your customer experience when using chat. Interactive Menus provide customers with intuitive views of the things that they can ask/do with your chat assistant.
Interactive messages come in the form of List picker, Time picker, Panel, Quick reply, and Carousel.
https://docs.aws.amazon.com/connect/latest/adminguide/interactive-messages.html
Here are just a few examples of how Interactive Menus can be used:
a. Carousel with Images
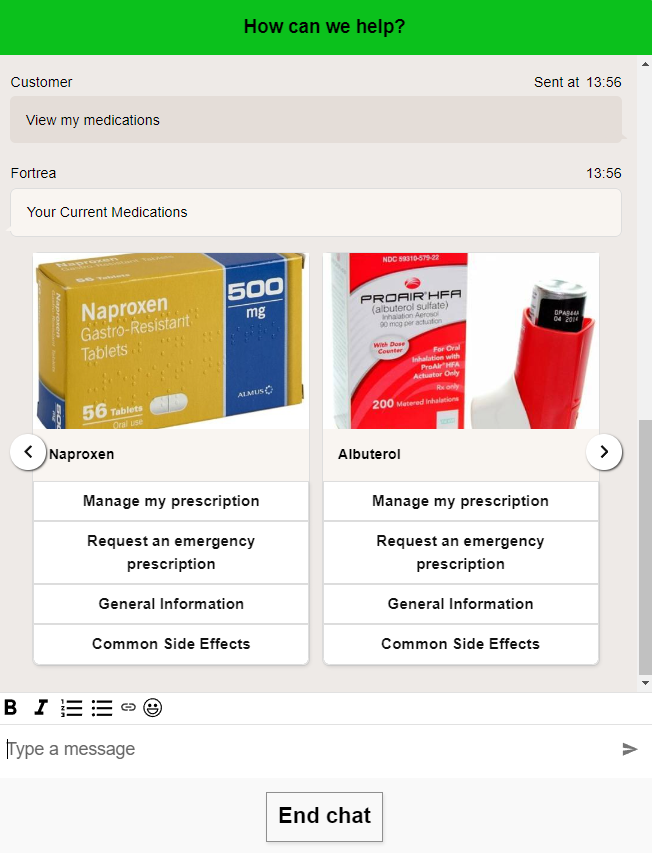
b.List Picker Menu
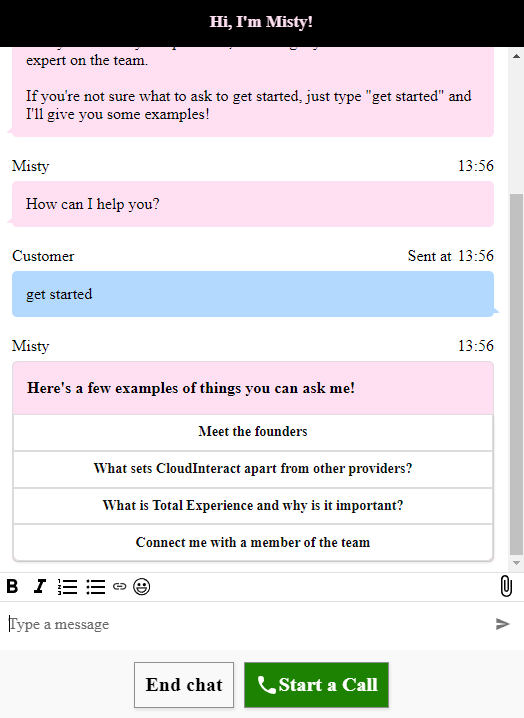
c. Quick Replies
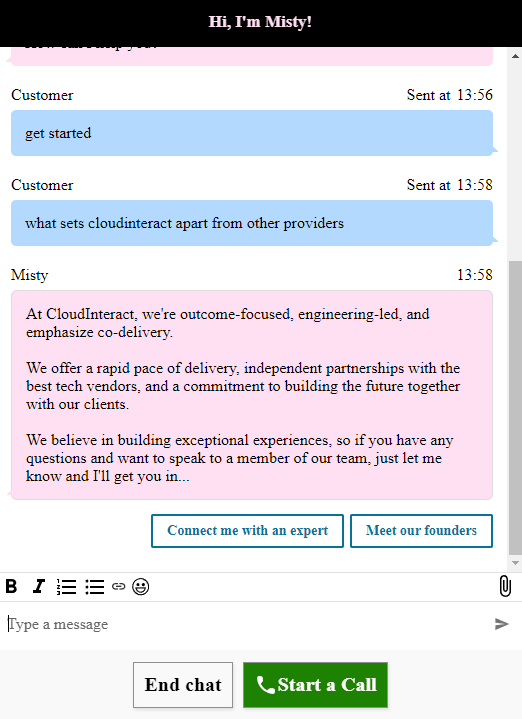
2. If a customer has started a conversation via the chat channel and then wishes to escalate to voice, this cannot be done without additional development. Out of the box, when a customer clicks ‘Start a Call’, the current chat will end and a separate unlinked voice contact will be started and so without additional development/routing logic, that customer could end up at the back of a queue, connected to a different agent without the context of their initial conversation.
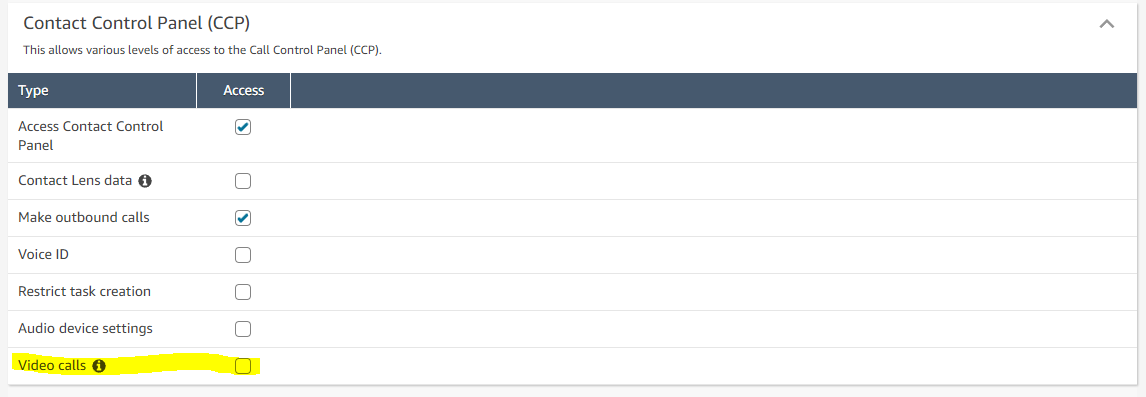
Escalation from Voice to Video, however, can be done seamlessly and does not require any additional development. Just make sure that your agent Security Profile has Video Calling enabled, otherwise they won’t be able to view or send video.
3. Cost – Web calling can offer a low-cost avenue into your contact centre, with audio usage charge currently $0.01 per minute, in addition to the Amazon Connect service usage charge of $0.018 per minute. With web calling you do not need to manage or pay for inbound phone numbers and so may prove to be a lower maintenance route – whether this provides a lower cost than your telephony route will come down to the location and types of numbers that you’re using. Usage of the video channel is charged at $0.015 per minute for each connection – that means that if both agent and customer are sending video, the total cost is $0.03 per minute for video, in addition to the audio usage cost of $0.01 and service usage cost of $0.018. Video is an extremely powerful channel that can provide an excellent customer experience and Amazon Connect provides that out-of-the-box for a low cost, but you may want to consider necessity as it does add to your bill. A full breakdown of cost can be found at https://aws.amazon.com/connect/pricing.
Conclusion
In conclusion, Amazon Connect's In-App, Web, and Video Calling capabilities represent a significant leap forward in enhancing customer communication experiences. The integration of these features into the Amazon Connect ecosystem not only provides a seamless and efficient way for businesses to connect with their customers but also underscores the commitment to offering innovative solutions.
The simplicity of the setup process, as detailed in this blog post, demonstrates Amazon Connect's dedication to user-friendly interfaces. From configuring preferences to customising the widget's appearance, businesses can swiftly deploy these communication channels without the need for extensive development efforts, ensuring that businesses, even those without extensive technical expertise, can quickly adopt these communication tools.
In essence, Amazon Connect's In-App, Web, and Video Calling capabilities open new avenues for businesses to connect with their customers in a digital era where effective communication is paramount. The user-friendly nature of these features, coupled with powerful customisation options, positions Amazon Connect as a leader in providing innovative and accessible solutions for businesses seeking to elevate their customer communication experiences.
Bentley Paton
Platform Engineer at CloudInteract
.svg)
.svg)

Want to know more?
See our other articles
Unlocking the Power of Generative AI – One Step at a Time
14 October 2024 | Nick Seagrave
Understanding the CX Maturity Journey: Are you ready to transform?
10 October 2024 | Simon Leyland

SIGN UP FOR OUR EMAILS
Website Design by Global Exposure
